Category: Food

  • Marinara sauce, revisited

    Marinara sauce, revisited

    Updated February 2019

    Click here to jump to the recipe

    The ultimate easy healthy 30 minute marinara sauce


    This easy tomato marinara sauce is not only a breeze to whip up on a weeknight, but it’s also as healthy as it gets!

    You might not have noticed, but I’m obsessed with tomato sauce. Well, tomatoes in general, but I lovvvee me some red lycopene-filled tomatoes! I could totally have made this a niche blog called SeeFoodTomato, because pretty much all of my favorite recipes start out exactly the same way: with a red sauce.

    That’s right – even my very first blog entry was for a marinara sauce! That was not by accident – it deserved the number one post status because tomato sauce is my number one (okay, Jonathan is technically but you know what I mean ;-)). She’s my go-to when I don’t feel like making an elaborate meal. You can turn a simple can of tomatoes into the base for a pizza, a fantastic plate of spaghetti, or a gooey cheesy baked pasta dish. Or you can dip bread in it. Or you can turn it into a bloody mary. Depending on your mood (and the type of day you’ve had), tomato sauce has your back. So yes, I do force myself to step out of my comfort zone on this blog and make recipes that are not just a bunch of tomato sauce based variations, but that doesn’t mean that I can’t share them, from time to time 🙂

    The first version of my marinara sauce that I posted is the simple, no-fuss easy ready-in-minutes version. It’s delicious, versatile, and above all, super fast but still rich and delicious. Sometimes, though, you want a more structured sauce, with slightly more complex layers of flavour. So if you’ve only got about 15 minutes, then go for my original marinara sauce recipe. If you have a few more ingredients and around an hour to let this sauce simmer, then please give this one a try. This sauce is solid, you guys, and would be great over a bowl of spaghetti, or even as the sauce in a lasagna or even… on a piece of bread. Yes, this stuff is legit so give it a try! This is the ultimate 30-minute marinara sauce, and the only red sauce recipe that you’ll ever need.

    marinara sauce revisited | seefoodplay.com

    30-minute marinara sauce| seefoodplay.com

    marinara sauce revisited | seefoodplay.com


    Recipe

    Easy, healthy marinara sauce

    • 2 8 oz cans crushed or whole tomatoes
    • 1 cup cherry tomatoes (optional)
    • 1 teaspoon salt
    • ½ teaspoon pepper
    • 1 teaspoon garlic powder
    • 1 tablespoon dried basil
    • 1 tablespoon dried oregano
    • 1/4 cup fresh basil (chopped)
    • 2 cloves fresh garlic (minced)
    • 1 small shallot (minced)
    • 1/4 cup fresh parmesan cheese (grated)
    • 2 tablespoons extra virgin olive oil
    • 1 bay leaf
    1. Add the shallot, garlic, and olive oil to a non-stick pot and sauté until cooked through (about 3-4 minutes) over medium heat.
    2. Next add in the spices (salt, pepper, garlic powder, dried basil & oregano) & cherry tomatoes, stir for 1-2 minutes.
    3. Add the whole tomatoes, using their juice to deglaze the pot.
    4. Add all remaining ingredients, then bring the pot to a boil
    5. Once boiling, reduce the heat to low and simmer for around 45 minutes to an hour.
    6. Remove the bay leaf*
    7. Using a wooden spoon or hand mixer, break down the tomatoes to have a smooth and uniform sauce (unless you like it chunky, which is great, too!).
    8. Allow to simmer on low for another 30 minutes (or as long as you can) before serving.


    *If you’ve never forgotten to take the bay leaf out of a soup or sauce, then lucky you, because it’s awful and can totally ruin your meal if you chop it up into your dish!

  • Banana bread

    Banana bread

    Banana bread | seefoodplay.comFor the past few weeks I have been loving watching the leaves change into gorgeous reds and yellows. Not to mention, I can finally break out my comfy scarf collection, now that there’s a nice chill to the air. Last week I happened upon the Spitalfield Market in London and kind of went scarf crazy! They have the biggest, comfiest, prettiest scarves to choose from… I couldn’t resist.

    As the days are getting shorter (as in, really short: it’s dark by 3.45pm in London!) and the air is getting cooler, I need my scarves, my sweaters, my cup of tea, and nice warm cinnamon-y banana bread. Okay… banana bread isn’t a make or break for my autumn mornings, but it is oh-so-good and tastes great for breakfast or for a snack, and just feels like autumn with the nutmeg and spices the recipe calls for.

    Banana bread | seefoodplay.com Banana bread | seefoodplay.com

    I have mentioned it before, but I feel compelled to reiterate that I am not a fantastic baker. I struggle with exact measurements, which it turns out, is fairly important when making cakes or any baked goods. I also don’t really like sweet things, so I’m not fighting back the urge to make cakes all the time anyway. Although, I do have a weak spot for my chocolate cake recipe but even still that’s usually for birthday celebrations or when I have guests over.

    Sometimes though I get major cravings for banana bread, because that stuff is the perfect answer to people like me. It’s super easy to make (read: hard to mess up) and you can tweak it to be as sweet (or not) as you like. It keeps for several days, and makes the perfect addition to breakfast, or for an afternoon snack. If you’re like me and appreciate all of the above and have a few over-ripe bananas that you’re trying to salvage, then look no further: this recipe is for you.

    Banana bread | seefoodplay.com

    Banana bread | seefoodplay.comBanana bread | seefoodplay.comBanana bread | seefoodplay.comBanana bread | seefoodplay.comBanana bread | seefoodplay.com

    Wet ingredients

    • 3 bananas, mashed
    • 1/4 cup vegetable oil
    • 1/4 teaspoon vanilla extract
    • 2 medium eggs

    Dry ingredients

    • 1 tsp baking soda
    • 1 teaspoon cinnamon
    • A dash of nutmeg
    • 1/4 teaspoon salt
    • 1/2 cup sugar
    • 2 cups flour

    Instructions:

    1. Preheat oven to 180 degrees Celsius.

    2. Prepare your baking dish (I use a bread mold) by buttering the edges or placing parchment paper.

    3. Combine all dry ingredients in one bowl, and wet ingredients in a separate bowl.

    4. Next, fold your wet ingredients into the dry ingredients, stirring well to get a uniform mixture.

    5. Pour the mixture into the prepared baking dish, and bake for 30-40 minutes, or until an inserted knife comes out clean.
    Note: if your oven is crazy like mine, then the top might start to brown way too soon. In this case, just cover it with a piece of aluminium foil.

  • Microwave scrambled eggs

    Microwave scrambled eggs

    microwave scrambled eggs | seefoodplay.comThis past month has been busier than busy, and my priorities have been less on food and more on…well, just getting things done. Now I’m the first person to not mind spending two hours on an elaborate morning breakfast on the weekend, whipping up pancakes, quiches, hash browns and whatever else my starving Saturday self is in the mood for. But sometimes… folks just don’t have time for that, and this past weekend was one of those moments when I needed food, fast, and had no time to mess around with pots, pans or complicated recipes.

    Even after living in France for ten years (argh… saying that makes me feel old…!), I never really got down with sweet breakfasts. No croissants or pains au chocolat for me! I’m a savory kind of girl, all the way. I’m getting into oatmeal in the morning now, but that has taken me about 25 years to get to that point. I need hearty. I need filling. I need much more than a pastry… ! So fast forward to this past Saturday when I’ve got tons of things to do, am starving, and my grocery delivery hasn’t yet arrived.

    Now I have tried (many, many times) to make eggs in the microwave, ever since one of my lovely colleagues mentioned the idea to me a few months ago. Sadly, microwave eggs have been a massive failure in my kitchen since I started trying to make them, most likely because my microwave doesn’t have a temperature/level setting…! We went ages without having a microwave when I finally decided we could sacrifice some counter space for it (yes, that’s why I forced Jonathan to reheat everything on the stove for months… because I didn’t want to give up precious space on our tiny kitchen counters for a big clunky microwave). Needless to say, I didn’t buy a top of the line model, and apparently the one I chose is so not top of the line that it only has one temperature setting: really high.

    So, sunny-side up eggs don’t come out magically perfect in my microwave, but I didn’t give up…and I’m glad I didn’t! I have stumbled on quite a few other microwave egg recipes, and today I’ll be sharing one of my favorites: microwave veggie scrambled eggs (in a mug).
    microwave scrambled eggs | seefoodplay.com microwave scrambled eggs | seefoodplay.commicrowave scrambled eggs | seefoodplay.commicrowave scrambled eggs | seefoodplay.com microwave scrambled eggs | seefoodplay.com

    Ingredients:

    • 1 egg
    • 1 tablespoon milk
    • 1 tablespoon shredded cheese
    • 2 tablespoons diced veggies (I used mushrooms, scallions, and cherry tomatoes)
    • Salt and pepper to taste

    Instructions:

    1. Crack your egg into your mug, then stir in in the milk, cheese and veggies.
    2. Cover your mug with a saucer or lid, then microwave for 30 seconds, stir, then for 20-30 more seconds.
    3. Serve over toast, or directly out of the mug (if you’re a Greedy McGreedy like me, and can’t wait to gobble these down).

    Note: cooking time will depend on your microwave. My microwave seems super powered on its unique one-size-fits-all temperature setting, so you might need to adjust cooking times accordingly.

  • Bacon-wrapped bbq chicken

    Bacon-wrapped bbq chicken

    Bacon-wrapped bbq chicken | seefoodplay.com

    Weekends are pretty busy in our household: we try to go out and explore our new city, travel around Europe, or do little projects around the house. So we don’t always have time to make big elaborate meals, and will either eat leftovers or random food from the fridge when I take a break from whatever project I’m working on (or blogging about…). This weekend was no exception: Jonathan graciously accepted to help me fold all my clothes that had gotten unruly since the last laundry day, and I was busy working on one of my blog posts. After Jonathan wandered into the kitchen about 10 times looking sad and hungry, and even my stomach started to rumble, I figured it was time for a little snack break.

    We usually grocery shop on Monday, and use the weekend to eat any leftovers from the past week. Translation: our fridge was pretty empty. On our last shopping order, I went a little crazy ordering turkey bacon when I discovered our grocery store actually carries it and I bought 4 packs of the stuff. A part of me secretly worried they’d realize how amazingly delicious the stuff is and stop making it, just to torture me. So, stock up, I did. I went crazy for it in part because me and Jonathan don’t eat pork but I’m not gonna lie: I love the salty smoky flavor of bacon. Turkey bacon is the healthier cousin of pork bacon, with all the same salty taste. I couldn’t really justify just cooking up a bunch of (turkey) bacon and serving it as a “snack” so I kept looking and realized we also had some chicken thighs that needed to be eaten, too. I originally thought of making a more elaborate cheddar & bacon-stuffed chicken casserole, but then came back to my senses because nobody had time to spend Saturday afternoon working on a new recipe.

    So, these bacon-wrapped BBQ chicken snacks were born out of necessity, lack of time and a pinch of laziness. But you guys, these are so, so good. Like, dangerously easy and good. I almost never make any kind of meat without marinating or at least seasoning it, but that is totally not necessary for this recipe! If you love (turkey) bacon and BBQ sauce then you pretty much should drop what you’re doing right now and make this recipe.

    Bacon-wrapped bbq chicken | seefoodplay.com Bacon-wrapped bbq chicken | seefoodplay.com Bacon-wrapped bbq chicken | seefoodplay.com Bacon-wrapped bbq chicken | seefoodplay.com Bacon-wrapped bbq chicken | seefoodplay.com Bacon-wrapped bbq chicken | seefoodplay.com

    Ingredients:

    • Two chicken thighs (boneless & skinless)
    • 12 strips of bacon
    • 1 cup barbecue sauce

    Instructions

    1. Preheat your oven to 200 degrees (Celsius)
    2. Cut each piece of chicken into 6 pieces
    3. Wrap each piece of chicken with one strip of bacon; use a toothpick to secure it in place if needed
    4. Set aside ½ cup of the BBQ sauce to dip your cooked chicken bites in
    5. Use the other ½ cup to brush a spoonful of barbecue sauce onto each piece of bacon-wrapped chicken
    6. Place each piece of chicken onto a baking sheet and bake for 20-25 minutes, or until cooked through.
    7. Serve immediately, with the remaining BBQ sauce on the side

    Servings: 12 bacon wrapped bbq chicken bites

    Bacon-wrapped bbq chicken | seefoodplay.com

  • Cucumber margaritas

    Cucumber margaritas

    **Updated March 2018**

    Cucumber margaritas | seefoodplay.comThese spicy cucumber margaritas are the perfect drinks if you’re looking for a light & refreshing take on the classic margarita recipe. Super easy – worth a try!
    We have a pretty solid division of tasks in our family (ie, between me and Jonathan): I do most of the cooking, and Jonathan steps in if I’m not keen to cook or if we are both in the mood for one of his recipes. Jonathan, on the other hand, is almost always on cocktail duty. He’s all about accurate measures, whereas I’m way more a pinch of this and a dash of that type of cook. With cocktails, though, you kind of need to be precise.

    Before we were married, I gifted Jonathan with a cocktail shaker and a huge book of all sorts of cocktails. His cocktails were soooo delicious, but I remember particularly feeling their effects much faster than what I was used to! Turns out, he was “accidentally” using double shots instead of standard shots. So, instead of two drinks I was having four…and so on lol.

    Anyway, when I want to try my hand in the cocktail laboratory I usually just play it by ear. This time, though, I knew I wanted to create a cocktail specifically for the blog because really, who doesn’t like a good cocktail? This recipe is even better because you can easily make a few modifications to turn it totally alcohol free – different, but just as good!

    I love love (love!) spicy cocktails, so anything with spicy flavors like ginger or hot sauce are right up my alley, so I knew I wanted to somehow find a way to add my new favorite discovery: smoked paprika.

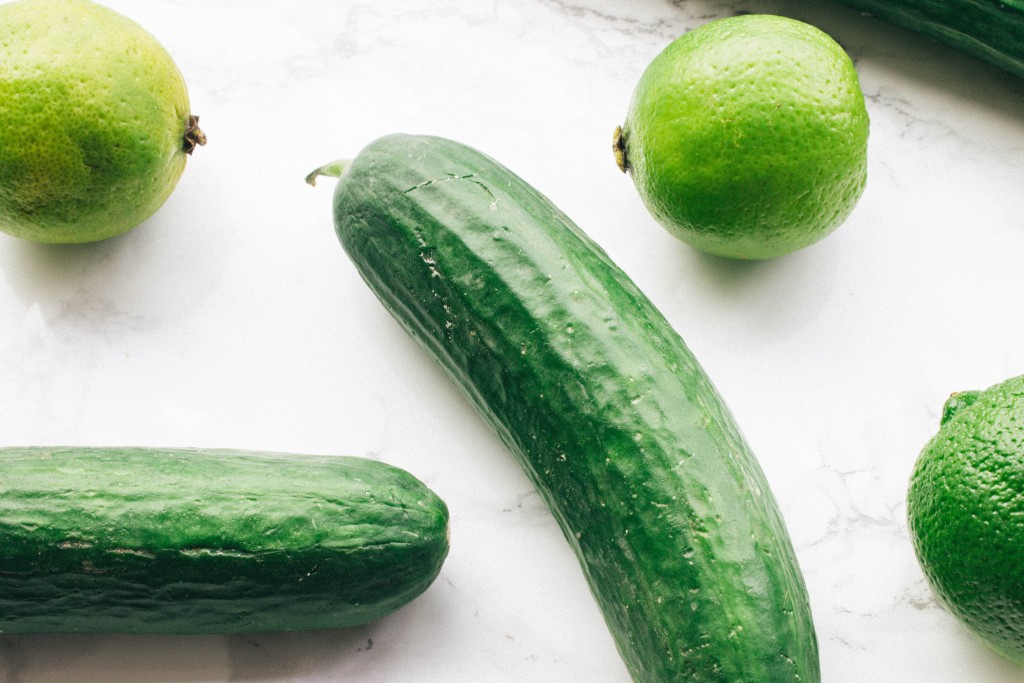
    The classic margarita on the rocks calls for: 2 oz Tequila, 1 oz Lime juice, 1 oz Cointreau. So far, so good. But what could I do to  jazz mine up a bit? I looked around the kitchen and spotted some very cucumbery-tasting cucumbers from our local food co-op and the light bulb went off: I had to try my hand at making a cucumber margarita! I added a spicy touch to it, and it was so refreshing and most importantly, not-too-sweet. These cucumber margaritas are the perfect drinks if you’re looking for a light & refreshing take on the classic margarita recipe. Super easy – worth a try!

    Cucumber margaritas | seefoodplay.com Cucumber margaritas | seefoodplay.com Cucumber margaritas | seefoodplay.com Cucumber margaritas | seefoodplay.com Cucumber margaritas | seefoodplay.com

    Ingredients:

    • 2 oz Tequila
    • 1 oz Lime juice
    • 1 oz Cointreau
    • ½ cucumber
    • 1 tablespoon smoked paprika powder
    • 2 tablespoons salt

    Instructions:

    1. Place your cucumber and 1 tablespoon of salt into your blender or food processor until completely smooth and uniform
    2. Take the cucumber and salt purée and pass it through a sieve to get an even smoother liquid
    3. Combine the tequila, lime juice, Cointreau and cucumber juice and shake with ice
    4. Mix together the remaining salt and the smoked paprika powder on a small plate
    5. Rub the rim of your cocktail glass with a lime wedge, then dip the rim of the glass into the salt mixture.
    6. Next, pour in your shaken margarita and add a few cucumber slices and lime wedges for garnish (totally optional)

    Cucumber margaritas | seefoodplay.com

    Cucumber margaritas | seefoodplay.com

  • Caramel covered popcorn

    Caramel covered popcorn

    caramel covered popcorn | seefoodplay.com

    Have you ever been in the mood for something sweet, but don’t have many ingredients to work with (or the energy to whip up something elaborate)? This doesn’t happen to me very often (I’ll take pasta over sweets almost any day), but when it does I never seem to have anything sweet on-hand. Despite Jonathan’s pleas (bad wife 😈), I never buy sweets or candy during our weekly grocery shops, so it’s never a question of just opening some cookies or eating an ice cream… if we want something sweet, then we gotta work for it.

    I do have a few go-to desserts for which I try to make sure I always have ingredients, like chocolate cake, caramel sauce and baked apples, and today’s recipe: homemade caramel covered popcorn! In case you haven’t noticed, I like my desserts nice and easy, requiring as little ingredients (and time) as possible. This popcorn recipe is perfect for me in that it takes about 10 minutes to make, isn’t overly sweet, and can be eaten immediately or stored for the next day’s snack. One word of caution: this stuff is majorly addictive and once you see how easy it is to make, you’ll find yourself making it over and over (and over) again! Warning over, now on to the good stuff 🙂
    caramel covered popcorn | seefoodplay.com
    caramel covered popcorn | seefoodplay.comcaramel covered popcorn | seefoodplay.com
    Ingredients:
    • 1/2 cup of popcorn kernels
    • 2 tablespoons vegetable oil
    • 1/2 cup of caramel cream sauce
    • Kitchen tool: large nonstick pot or pan with a tight-fitting lid
    Instructions:
    1. Pour your popcorn kernels and oil into a large bowl and mix until the kernels are nice and coated in the oil*
    2. Transfer the kernels to your pan or pot, then heat on medium-low until you hear the kernels start to pop.
    3. Once the popping starts, turn the heat up a bit to accelerate the process and keep on the heat until the pops are less-frequent (about less than 1 pop every 3-4 seconds). Important: If you smell burning at all then remove the pot from the heat – no sense ruining an entire batch of popcorn to get a few more kernels popped!
    4. Now that your popcorn is popped, add it back into the large mixing bowl and slowly pour the caramel in until the kernels are nice and evenly coated.
    5. Sprinkle with sea salt, turn on Netflix and get ready to enjoy the perfect snack for binge watching Orange is the New Black 😉
    *Note: this step isn’t strictly necessary but I do this each time and my popcorn pops evenly without burning, and without a bunch of un-popped kernels in the pot so I consider this to be my little trick… but feel free to skip it if you’re in a hurry!
  • Weekly meal plan

    Weekly meal plan

    Weekly meal plan collage - 2 august 2015 | seefoodplay

    This edition of my weekly meal plan brings you some very easy recipes, most of which can be made from ingredients that you probably already have on-hand!

    If you’ve been reading my blog, then you probably know that I’m big into meal prep and planning. Now, though, I’ve decided to be a bit more structured about consistently writing down our meal plans and sharing them with my readers on a weekly basis! 🙂

    I’m focusing on healthy eating now more than ever before, partly because I’ve recently found out that I have a few health issues that I need to sort out… again. I’m starting to wonder if I can improve my overall state of health and well-being by changing what we eat, even just a little bit. I’ll be doing a daily lemon water experiment, too, so keep an eye out for more details on that in the coming weeks!

    As usual, I don’t usually include breakfast or lunch in my meal plans because I like to those meals flexible. I have plenty of make-ahead snacks ready to go in the fridge & freezer, and will grab a soup or salad near my office if I want to have something different.


    Monday // Jonathan’s pasta pesto

    Tuesday // Oven-fried chicken (shake n bake) w/asparagus and hasselback baked potatoes

    Wednesday // Appetizer tomato, bresaola & mozza w/truffle salt & olive oil & balsamic vinegar. Main dish: Butter, garlic & dill baked salmon with tagliatelle.

    Thursday // Smoked paprika & lime shrimp w/rice

    Friday // Homemade ramen, fried egg & cucumber salad


    simple baked salmon | seefoodplay.com Oven-roasted asparagus | seefoodplay.com IMG_1351 Cilantro lime rice| seefoodplay.com

    Breakfasts & Lunch: this week I will be bringing things from home for breakfast & lunch. Lots of copycat bacon & egg mcmuffinshomemade frappaccinos, freezer burritos, and well…leftovers!

  • Copycat Starbucks Frappuccino

    Copycat Starbucks Frappuccino

    Copycat Starbucks Frappuccino | seefoodplay.com

    Since I moved to London a few months ago, I’ve been both blessed and cursed with the luxury of having a Starbucks right downstairs from my office. When I lived in Paris, the occasional treat of a grande white chocolate with whipped cream was just that… an occasional treat. If I was on my scooter, then it was a dangerous balancing act trying not to spill the drink precariously tucked at my feet. If I was driving, then I had to illegally — er, creatively — park and race in and out before blocking traffic, getting a ticket… or both. Now, all I have to do is head down two flights of stairs and find myself conveniently waiting in line to order my favorite drink du jour.

    I know Starbucks has a lot of haters, but I can’t help it: I love the stuff. What I don’t love, though, would definitely be the hefty price tag and the tons of sugar and calories. When I realized that I’d developed a pretty much every-day habit of indulging in the stuff, I decided it was time to shake the addiction. And by that, I mean: I decided to start making it at home.

    Because I like to buy lots of cool stuff I don’t need on Amazon, I just so happened to already have the perfect bottles to store my homemade version of these delicious drinks in. So now, I make them in advance (they keep for up to a week in the fridge) and enjoy them whenever I want, and for a fraction of the price. Fellow Starbucks addicts around the world: you’re welcome – this recipe is for you ☕️

    Copycat Starbucks Frappuccino | seefoodplay.com Copycat Starbucks Frappuccino | seefoodplay.com Copycat Starbucks Frappuccino | seefoodplay.comCopycat Starbucks Frappuccino | seefoodplay.com

    Ingredients:

    • 150 ml coffee (brewed & chilled)
    • 25 ml whole milk
    • 1 tablespoon simple syrup
    • 1 teaspoon vanilla extract
    • Whipped cream (optional)

    Instructions: this one’s pretty simple, you just place all of the ingredients in your mug (or bottle if you’re making this ahead of time), add a little whipped cream when serving and enjoy!

    Note: This recipe is a copycat of the bottled version of the Starbucks Frappucino, not the one they sell in their cafés (ie, made with ice!).


  • My birthday…and chocolate cake

    My birthday…and chocolate cake

    birthday chocolate cake | seefoodplay.com

    This Saturday was my (31st….) birthday, and it was fabutastic. Yes, new word, that’s just how awesome it was. I had a few annoyances throughout and somehow managed to actually cry at one point, but all in all, it was one of my best birthdays yet! All of the credit goes to my husband, though, and he really hit a home run this year. Thanks to him, I have a few new London travel tips for you to check out — well worth it! Also — keep reading for another amazingly easy cake recipe!

    Jonathan planned out my day, from start to finish, and I am still impressed by how perfect everything turned out to be. My Type-A self had a hard time not knowing what we were going to be doing at all times, but I quickly let go and am so glad I did.

    When Jonathan said we had to be up and out of the flat by 6.30am I thought he was joking (again, this was Saturday…), but when we were up and out by 6.45 (getting out of the house always takes us ages) I knew he meant business with the “Day of Birthday Surprises” 🙂

    Our first stop was for breakfast at E Pellicci, a tiny little hole-in-the-wall cafe serving up full English breakfasts (including a vegetarian option). Their cappuccino’s were everything you might possibly need that early on a Saturday morning, and the food was delish. Okay, Jonathan…. I see you.

    Next we popped down to Oxford street to wander around a bit and to do some shopping. London is pretty awesome first thing in the morning, before all the tourists are milling about; there’s something really special about a big city like London with no cars or people around. When we travel, we try to make it a point to get up before the sun comes up to go out and explore: it’s a magical sleepy point in the day when everything is just a little bit more beautiful — I highly recommend giving it a try! So I guess we were tourists in London for the morning 🙂

    After our Big Adventure visiting London, we headed back East to get some real shopping in: I needed new shoes (I’m using the term “need” quite loosely, here), so off to the mall to pick those out we went. I ended up getting an amaaaazing pair of Nine West black pumps for 75% off (um, hello? I’ll take that deal any day), so that alone made my day a sucess. But it wasn’t over yet…!

    We had just enough time to come home to change and get ready for our night on the town, and this is where things got even more special.

    Jonathan must have spent countless hours researching (and apparently my love of Tripadvisor rubbed off on him) until he found the perfect spot for dinner: The Sixtyone. Our food was exquisite, from the beginning to the end! We both love our grub, so I don’t take it lightly to say that this is one of the best meals I have had in a restaurant in a long time. We got fish and lamb, and both were cooked to perfection, and even our cocktails were out-of-this-world amazing. Check out the addresses below!


    E Pellicci
    Full English breakfast & Italian classics
    332 Bethnal Green Rd, London E2 0AG, England
    +44 20 7739 487

    Westfield Shopping Center (Stratford)
    uk.westfield.com/stratfordcity
    Montfichet Rd, London E20 1EJ
    020 8221 7300

    Sixtyone Restaurant
    sixtyonerestaurant.co.uk
    61 Upper Berkeley St, London W1H 7PP
    020 7958 3222

    Now onto that cake recipe I promised you. Okay so first of all, I need to confess: I originally wanted to take a bunch of photos during the day to add them to this post, but as usual, I’m terrible at snapping shots so only had one sad little photo of my Birthday Dessert graciously offered to me by the Sixtyone staff:

    birthday chocolate cake | seefoodplay.com

    Then I started thinking — I should post a picture of my own cake that I’ve baked (because I’m so good at baking…). I’ve been playing around a bit with my Easiest Chocolate cake recipe for a while, trying different variations, mostly for when I’m in the mood for something fluffier. You guys… trust me when I tell you: this cakey cake recipe is so easy, so fast, and so perfect for a birthday cake celebration for two…! It came out so good I couldn’t believe that I made it, totally from scratch, in less than 30 minutes all together.

    Baking isn’t easy for me, so I need my recipes to be fool-proof (times ten). Given that, I’ve kept the quantities as uniform as possible — nothing is worse than when a recipe calls for 1.5 cups of this, 3/4 cups of that, 2 tbps of another thing, sprinkled with 1.5 tsps of that one ingredient you already forgot you needed…! So, here’s my take on the classic chocolate cake — whether you’re a super-star when it comes to baking, or (like me) need to keep it simple — this recipe will not let you down.

    birthday chocolate cake | seefoodplay.com birthday chocolate cake | seefoodplay.com birthday chocolate cake | seefoodplay.com birthday chocolate cake | seefoodplay.com birthday chocolate cake | seefoodplay.com

    Ingredients:

    • 1 egg
    • 1/2 cup milk
    • 1/2 cup oil
    • 1/2 cup cocoa
    • 1/2 heaping cup flour
    • 1/2 heaping cup sugar
    • 2 teaspoons baking powder

    Instructions:

    1. Combine the egg, sugar, milk, and oil whisking for about 1 minute
    2. Next, whisk in the flour, sugar, baking powder and cocoa powder
    3. Whisk for another minute or two until everything is nice and smooth
    4. Pour your mixture into a small buttered baking pan (this fills two 5 inch spring form pans, which are what I use)
    5. Bake on 190degrees (celsius) for about 20-25 minutes
    6. Once cooled, finish it off with your favorite icing, and enjoy your teensy weensy perfect-for-couples birthday cake!

    *Note: this cake mix fills two of my pans, but would also work quite well in cupcake tins – I think it would fill about 5 cupcake molds.

    **Note: I had two molds, so I made the cutest little two-layer cake ever, but you could just serve this as a single layer cake for one person, too!

  • Red-chili hummus + Bastille Day

    Red-chili hummus + Bastille Day

    red chili hummus | seefoodplay.com

    You guys…this is the first time in ten years that I’ll actually have to work on the 14th of July (without earning holiday pay, at least…!). This is also my first Bastille Day that I’ll be celebrating since actually being French! Much like the last time I had the 4th of July off work was ten years ago, I now have two countries whose independance day festivities must be celebrated from my office. I survived though, and have a nice little spicy hummus recipe to share with you today! Also, keep reading for a little bonus all the way at the bottom of this post 😉

    July 14th is Bastille Day or La Fete Nationale in France, which commemorates the beginning of the French Revolution in 1789. I’m feeling particularly nostalgic for my adoptive country today, and am a bit disappointed to be missing out on the parade, the picnics, BBQs and all-around good cheer. If you’re wondering what French people actually do on the 14th of July, then check out this video from Comme un Francaise: http://www.commeunefrancaise.com/bastille-day/.

    I’ve got my adorable French husband by my side here in London, though, so I suppose I have all the French-ness that I need at all times anyway 🙂

    So while Jonathan and I would prefer to be picnicing out on the Champs de Mars in Paris, instead we are at home in our lovely little London apartment, enjoying a nice bottle of Médoc that his parents kindly brought us when they were in town last week, waiting for our chicken to roast 🍷🍗

    On the menu for tonight is a Harissa-rubbed roast chicken (yum! lol) with potatoes cooked in the drippings, with homemade red-chili hummus and pitta chips as an appetizer. A nice multicultural meal for our multicultural home ❤️🇺🇸🇫🇷

    This hummus was so on-point, you guys — I even surprised myself with the stuff! The best part of hummus is the garlic (yummmmm) but since I can’t really eat it in mass quantities like I would do if I could, I was worried that it’d come out bland. Oh, and I didn’t use tahini. It all worked out, though, and this recipe got the Jonathan stamp of approval, too. This one’s a winner you guys — try it for yourself!

    red chili hummus | seefoodplay.com red chili hummus | seefoodplay.com red chili hummus | seefoodplay.com red chili hummus | seefoodplay.comred chili hummus | seefoodplay.com
    Ingredients:
    • 1 400g can of chickpeas (drained, save the liquid)
    • 2 cloves of garlic
    • 1 tablespoon of salt
    • Juice from 1 lemon
    • 3 tablespoons of olive oil (plus extra to drizzle on top)
    • 1 teaspoon of sesame oil
    • Sesame seeds & red chili flakes for garnish
    Instructions:
    1. Place the chickpeas, garlic, lemon juice, sesame oil and salt in a food processor and pulse for about 60 seconds to break down the chickpeas and combine the ingredients. Scrape down the sides a bit, if needed.
    2. Turn the food processor back on, and slowly add in the olive oil (through the little spout thingy). If yours doesn’t have a spout that you can pour into while running, just add all the oil in and continue processing.
    3. Serve garnished with some red chili flakes, sesame seeds and extra olive oil. Then go crazy with pitta chips, carrot sticks, or whatever else you want! This stuff goes with everything. Enjoy!

    Note: I had to let my food processor go for a good 2 minutes before I got a nice and smooth consistency. If yours is too thick, then slowly add in the liquid that you saved when you drained the chickpeas.

    As a bonus, maybe because our wedding anniversary is coming up and maybe because I’m missing Paris just a little bit more than usual, here are two of my favorite moments from our engagement photo shoot 💕

    Paris engagement photos | seefoodplay.comParis engagement photos | seefoodplay.com

    Xx